Add New Record
Tap or click on a safe's name to get to its contents, then click the  Add button. Select Password, Note, File, Card or Folder in the drop-down menu.
New Password Record
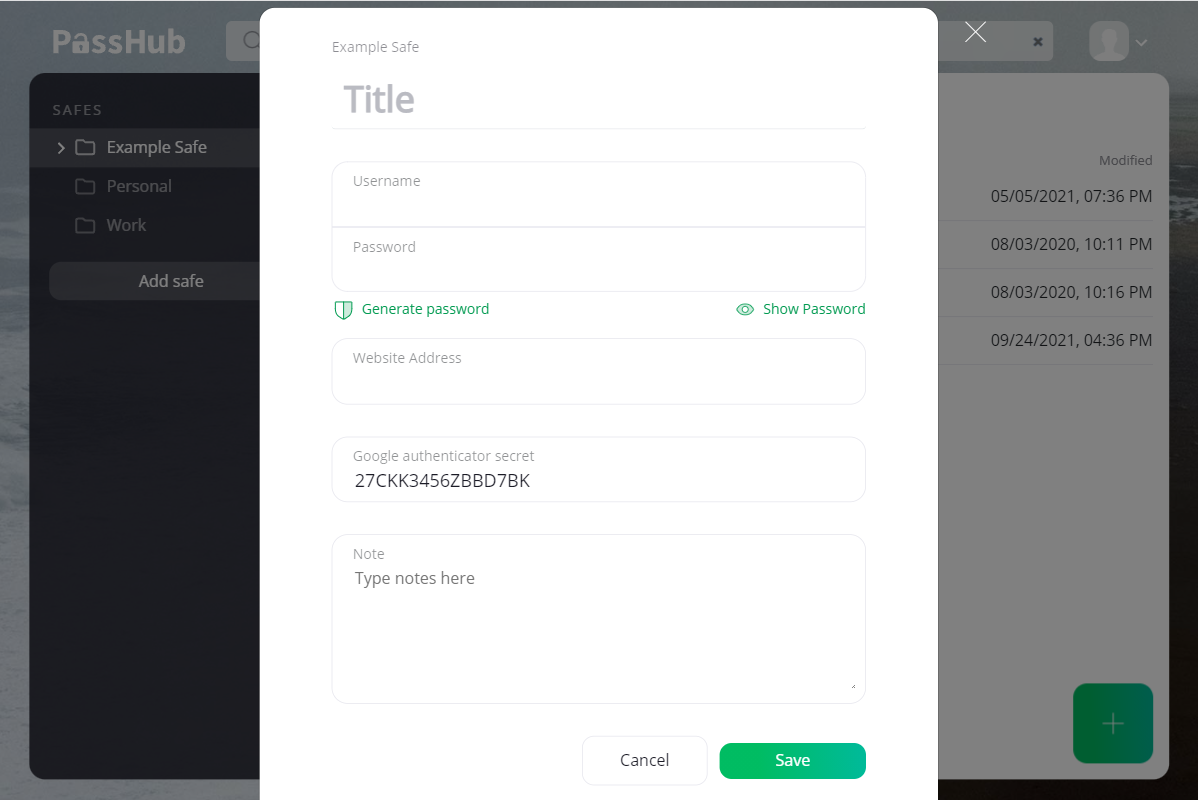
Fill the form shown below, where
- Title - identifies the account entry. It is the only required field in the form.
- Username/password - the credentials of the account. Use the provided random password generator to get a strong password by simply clicking Generate Password.
- URL - network name or IP address of the resource.
- Notes - specific notes, instructions, or any other messages you want to include. These are safely encrypted and stored with each entry.
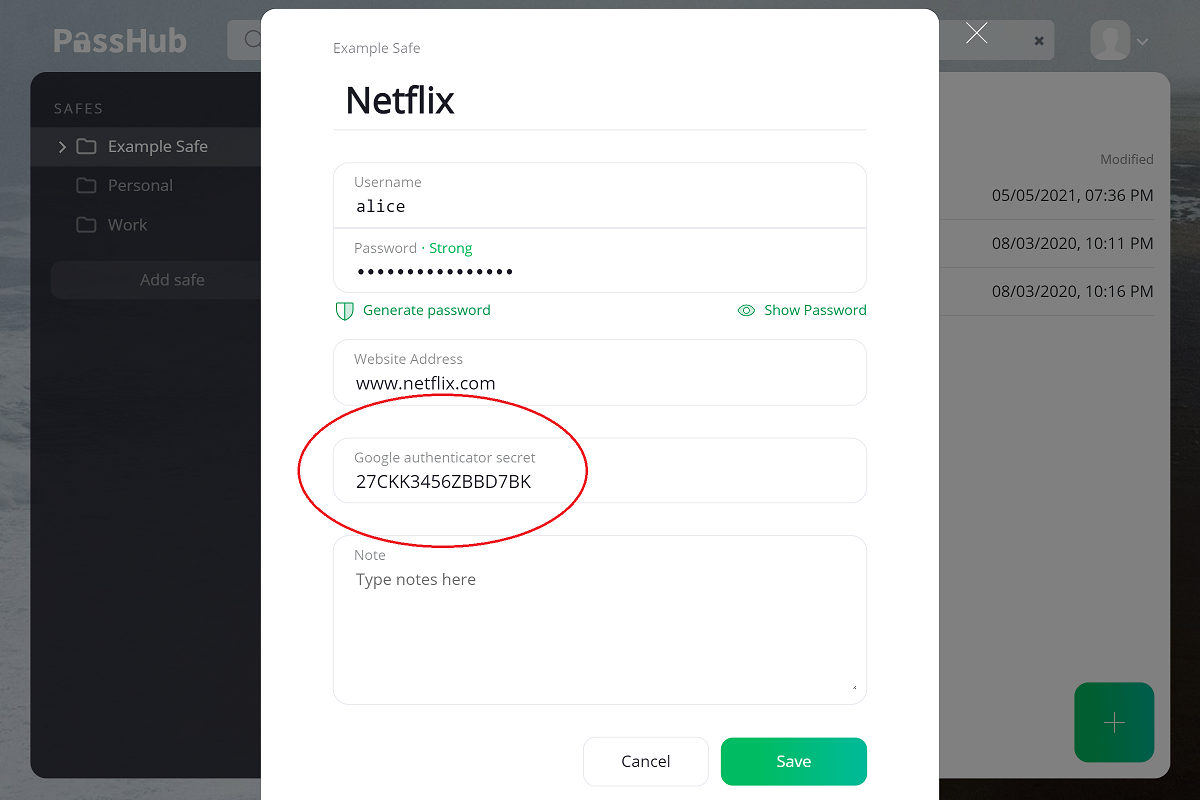
Google Authenticator (TOTP, Time-based One-Time Password)
You can add a second factor authenticator (rfc6238) to the login entry. PassHub generates a six-digit sequence automatically for you. The one-time code generation is based on a shared secret (base32 string), which usually can be found close to the QR code on the service provider site, e.g.
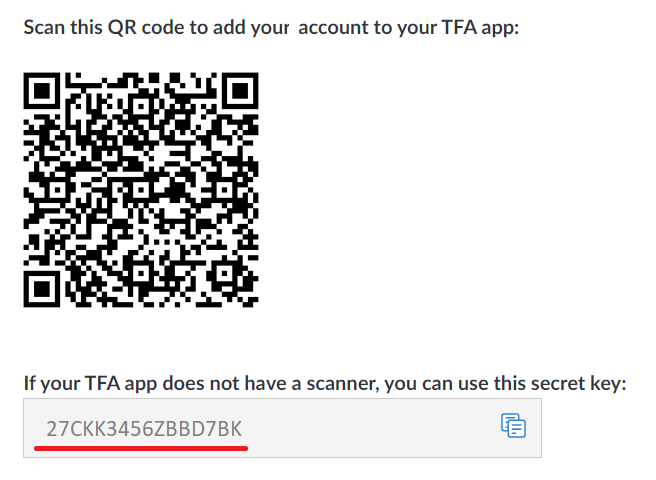
In the Login Entry form, click Add Google Authenticator secret to open the TOTP input field. Enter the shared secret code.
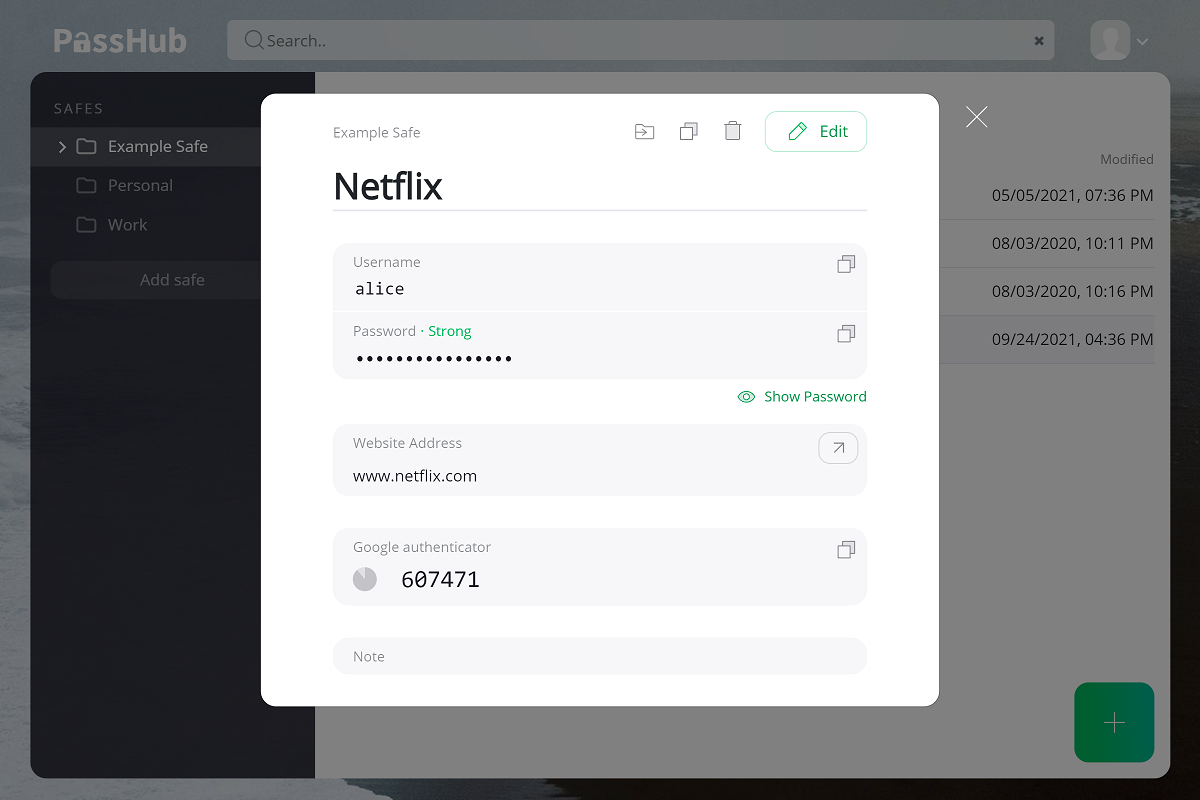
Now the TOTP-code will be shown in the Login view, along with time remaining till the code change:
New Note
Note is a special type of record to store arbitrary, unstructured texts. The Note dialog contains only the Title and the Notes fields.
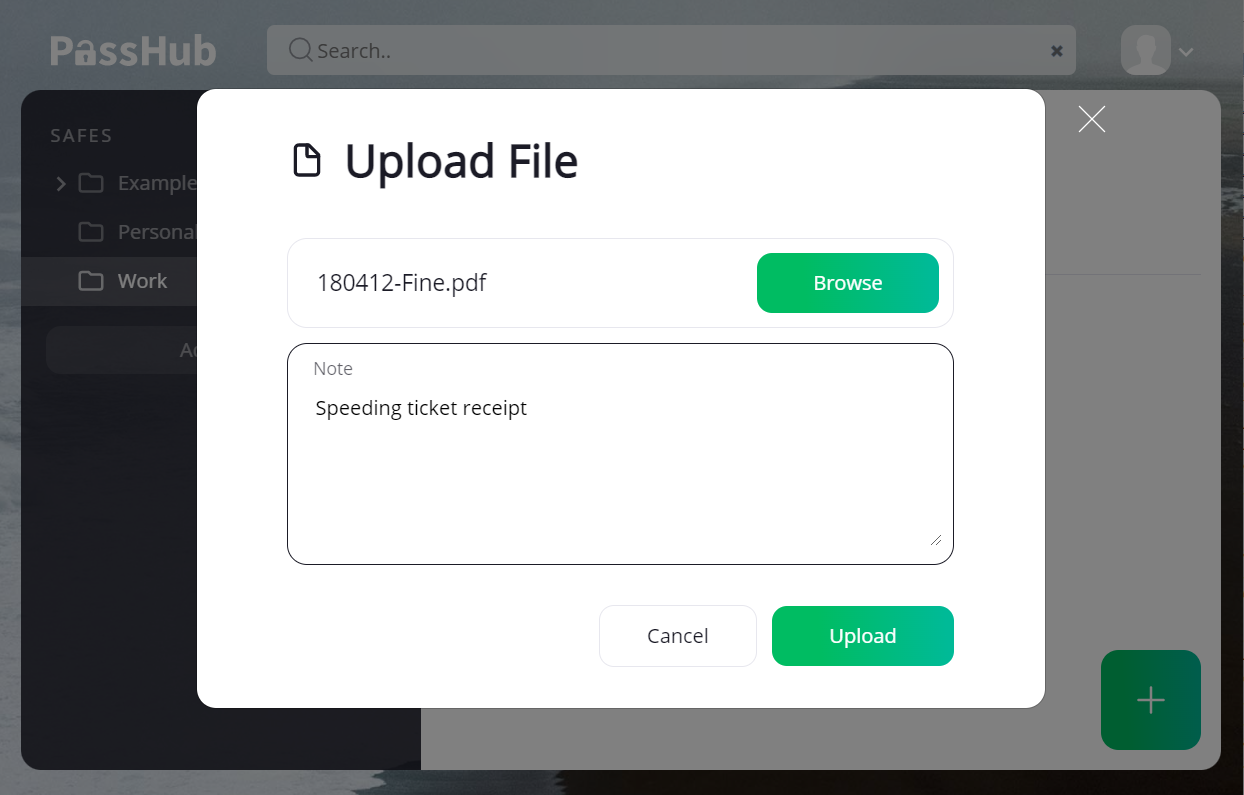
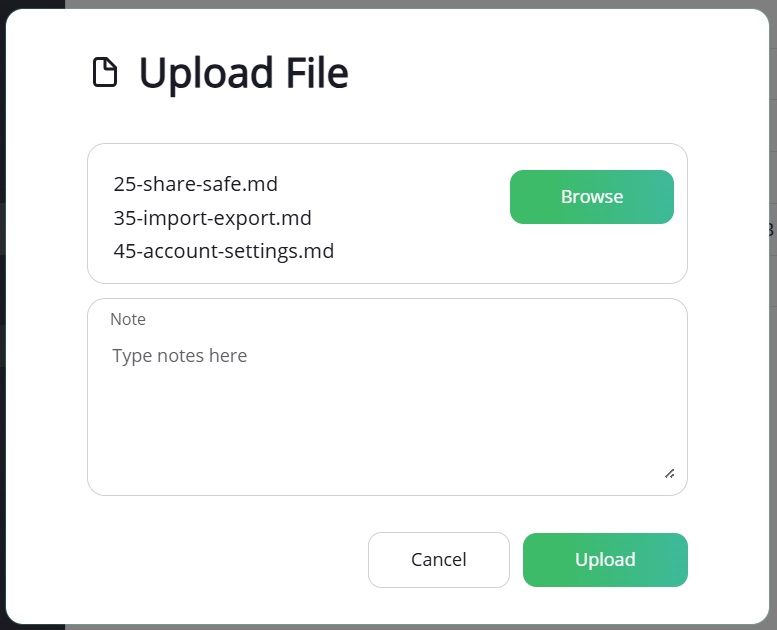
New File
You can store files in PassHub, too! These may be sensitive documents you share with clients, SSL certificates used widely in IT, and so on. File names and content are encrypted the same way as all the other data in PassHub.
Click the Browse button to select a file, or, on a desktop, just drag the file into the filename field. You can also add a note, which can help you search for this file in the future.
When finished, click the Upload button.
It is possible to upload a number of files in one step: using multiple selection feature of the operating system, choose files in the Browse dialog or Drag-and-Drop them on the desktop.
New Credit Card
Storing credit card data is straightforward: just enter the credit card number, owner's name, CVV, and expiration date into the corresponding fields.
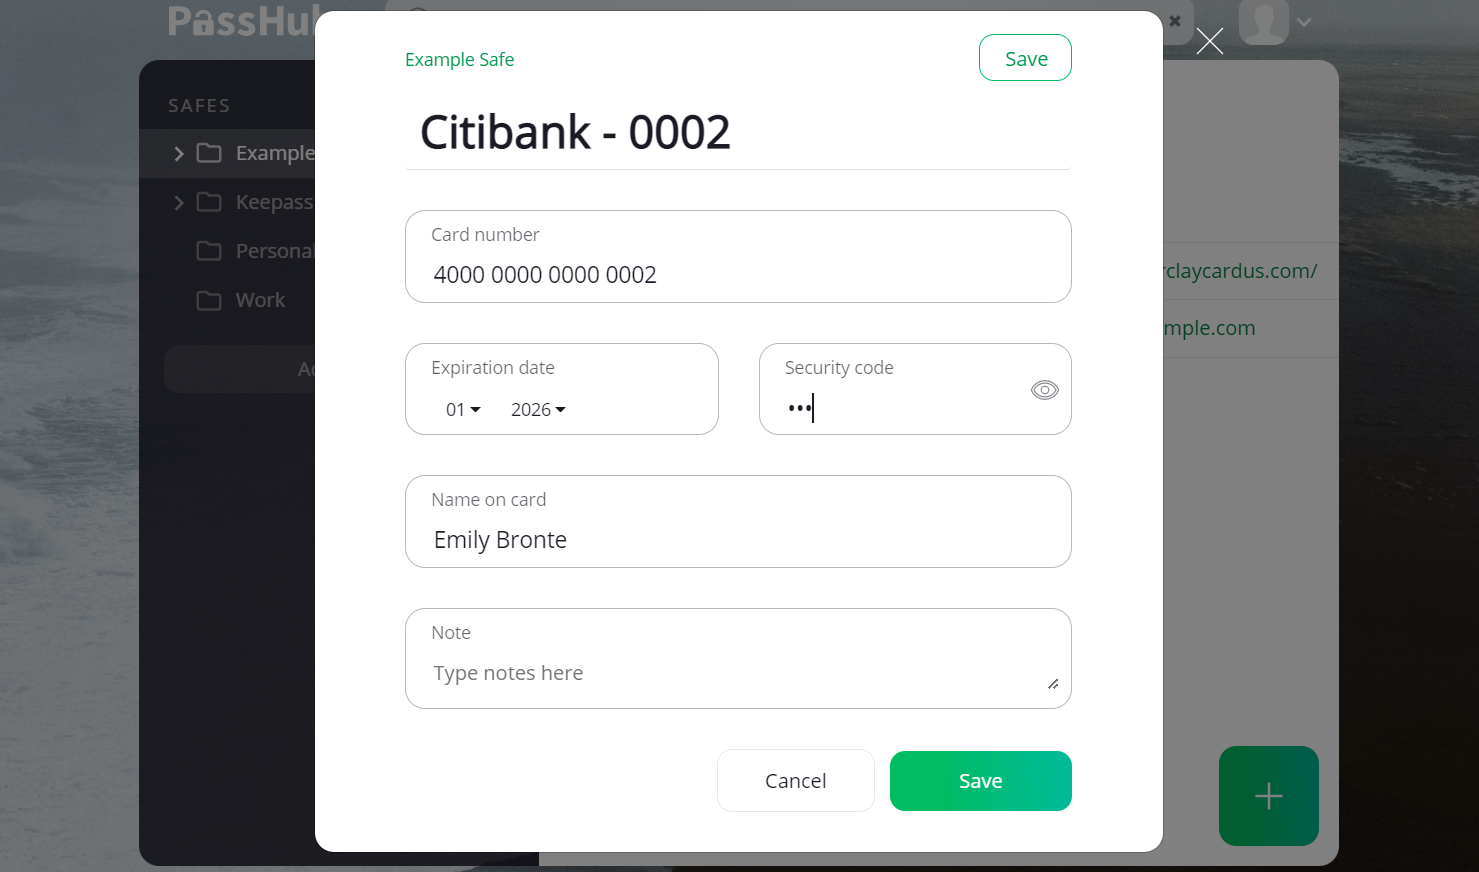
You can use the PassHub.net browser extension to automatically fill in your card data when you shop online. For details, see the Browser extension page.